
How to Build a Gaming PC: Step-by-Step Beginner Guide
Building your first custom desktop computer can feel like a daunting project. Taking hundreds—or even thousands—of dollars worth of delicate microprocessors, circuit boards, and glass panels and piecing them together yourself might seem like a job reserved for professional IT technicians.
However, learning how to build a gaming PC is far easier than most beginners realize. Modern hardware design relies heavily on standardized keys, color-coded connectors, and modular snapping mechanisms. Put simply, assembling a modern desktop is less like complex electronic engineering and more like building a high-end Lego kit.
This comprehensive gaming PC build guide walks you through every phase of the process. You will learn how to choose the right gaming PC components, double-check hardware compatibility, assemble every part step-by-step, install your operating system, configure drivers, and troubleshoot common first-boot issues. Whether you are assembling a budget-friendly rig for esports titles or a high-end powerhouse for 4K gaming, this guide will give you the confidence to complete your first build safely and successfully.
Gaming PC Components Explained
Before opening component boxes, it helps to understand the role each part plays in your completed system. A functional gaming desktop requires eight core hardware components, plus optional cooling accessories.
                          ┌───────────────────────┐
                          │     POWER SUPPLY      │
                          └──────────┬────────────┘
                                     │
      ┌──────────────────────────────┴──────────────────────────────┐
      │                         MOTHERBOARD                         │
      │  ┌──────────────┐   ┌──────────────┐   ┌─────────────────┐  │
      │  │     CPU      │   │     RAM      │   │   M.2 NVMe SSD  │  │
      │  └──────┬───────┘   └──────────────┘   └─────────────────┘  │
      │         │                                                   │
      │  ┌──────┴───────┐   ┌──────────────┐                        │
      │  │  CPU COOLER  │   │   GRAPHICS   │ (Direct PCIe Connection│
      │  └──────────────┘   │  CARD (GPU)  │  to CPU)               │
      └─────────────────────┴──────┬───────┴────────────────────────┘
                                   │
                           ┌───────┴───────┐
                           │    MONITOR    │
                           └───────────────┘
1. CPU (Central Processing Unit)
The CPU, often called the processor or the “brain” of the computer, executes game logic, handles artificial intelligence, manages physics calculations, and feeds instructions to your graphics card.
When choosing a CPU, you will select between two major manufacturers: AMD (such as the Ryzen series) and Intel (such as the Core / Core Ultra series). For gaming, raw single-core clock speed and efficient instruction processing are often more important than high core counts, though modern titles run best on processors with at least 6 to 8 core architectures.
2. GPU (Graphics Processing Unit / Graphics Card)
The GPU is the single most critical component for gaming performance. It receives 3D world data from the CPU and renders it into the frames displayed on your monitor.
Your choice of graphics card dictates your target resolution and frame rate:
-
1080p (Full HD): Entry-level to mid-range cards easily handle 1080p gaming at high frame rates.
-
1440p (Quad HD): Mid-range to upper-tier GPUs provide the optimal balance between visual clarity and smooth performance.
-
4K (Ultra HD): Flagship, high-end graphics cards are required to drive demanding games at 3840×2160 resolution with ray tracing features enabled.
Major GPU chip designers include NVIDIA (GeForce RTX line), AMD (Radeon RX line), and Intel (Arc line).
3. Motherboard
The motherboard is the primary printed circuit board that connects every component in your system, allowing them to communicate with low latency.
Key terms to know when shopping for a motherboard include:
-
Socket: The physical interface where the CPU rests (e.g., AMD AM5 or Intel LGA1700/LGA1851). Your CPU and motherboard sockets must match.
-
Chipset: The motherboard’s internal logic hub (e.g., B650, Z790, B860) that determines connectivity options, USB ports, PCIe lanes, and overclocking support.
-
Form Factor: The physical size of the board. The most common sizes are ATX (standard full-size), Micro-ATX (mATX, compact), and Mini-ITX (ultra-small).
-
RAM Support: Modern motherboards support DDR5 memory (or DDR4 on legacy budget platforms). Ensure your motherboard matches your RAM generation.
4. RAM (Random Access Memory)
RAM acts as your computer’s short-term working memory. It holds game assets, textures, and operating system data that the CPU needs to access instantly.
Key factors include:
-
Capacity: A modern gaming PC needs a minimum of 16 GB of RAM. For heavy multitasking, modern AAA titles, and background applications, 32 GB is the recommended sweet spot.
-
Speed: Measured in megatransfers per second (MT/s) or megahertz (MHz). Faster memory yields higher frame rates in CPU-bound games.
-
Dual-Channel Operation: Always install RAM in matching pairs of two sticks (e.g., two 16 GB sticks instead of one 32 GB stick) to allow the CPU to read data across two 64-bit channels simultaneously, doubling memory bandwidth.
5. Storage (SSD vs. HDD)
Storage holds your operating system, software programs, and game installations permanently.
-
NVMe M.2 SSD: These small, gum-stick-sized solid-state drives plug directly into the motherboard. Utilizing the High-Speed PCIe interface, NVMe drives deliver blazing-fast load times and are essential for modern PC games using direct-asset streaming.
-
SATA SSD: Older, box-style SSDs connected via cables. Faster than traditional hard drives, but significantly slower than NVMe drives.
-
HDD (Hard Disk Drive): Mechanical spinning drives offering high capacity at low prices. They are too slow for modern game installations and are best reserved for bulk media storage and backups.
6. Power Supply Unit (PSU)
The power supply converts AC electricity from your wall outlet into regulated DC power for your PC components.
-
Wattage: Your PSU must supply enough power to cover the total energy draw of your CPU, GPU, and system fans, with roughly 20% headroom. Typical gaming builds require between 650W and 1000W.
-
Efficiency Rating: Look for 80 PLUS certifications (Bronze, Gold, Platinum). Higher ratings mean less wasted electricity converted into excess heat.
-
Modular vs. Non-Modular: Full-modular power supplies allow you to attach only the cables your build requires, making gaming PC cable management significantly easier.
-
12V-2×6 / PCIe Cables: Ensure your power supply includes native power connectors compatible with your specific graphics card.
⚠️ Safety Warning: Never open a power supply casing. Power supplies contain heavy-duty internal capacitors that store lethal electrical charges long after being unplugged from wall power.
7. PC Case (Chassis)
The case houses and protects your hardware while directing air through the system to keep components cool.
-
Form Factor Match: Your case must support your motherboard size. A mid-tower ATX case accepts ATX, Micro-ATX, and Mini-ITX boards.
-
Clearance Dimensions: Verify that the case is long enough to fit your chosen graphics card and tall enough to accommodate your CPU cooler.
-
Airflow Design: Choose a case with a mesh front panel rather than a sealed solid glass front to ensure adequate fresh air intake.
8. CPU Cooler
CPUs generate significant heat during gaming sessions. A dedicated cooler sits directly on top of the processor to draw heat away.
-
Air Coolers: Metal heatsinks paired with fan assemblies. They offer extreme reliability, simple installation, and low costs.
-
AIO (All-In-One) Liquid Coolers: Closed liquid loops containing a pump, tubing, and a radiator. They offer sleek aesthetics and superior thermal management for high-wattage CPUs.
9. Case Fans
Case fans establish proper airflow paths within the chassis:
-
Intake Fans: Positioned at the front or bottom of the case to draw cool ambient air inside.
-
Exhaust Fans: Positioned at the rear or top of the case to expel hot air pushed out by the internal components.
How to Check PC Component Compatibility
Before purchasing your parts, confirm that every piece of hardware is physically and electrically compatible with the rest of your system.
                           COMPATIBILITY CHECKLIST
   ┌───────────────────────┬───────────────────────┬───────────────────────┐
   │       COMPONENT       │    MUST MATCH WITH    │    KEY SPECIFICATION  │
   ├───────────────────────┼───────────────────────┼───────────────────────┤
   │ CPU                   │ Motherboard           │ Socket Type           │
   │ Motherboard           │ PC Case               │ Form Factor           │
   │ RAM                   │ Motherboard           │ DDR Generation        │
   │ GPU                   │ PC Case               │ Length Clearance (mm) │
   │ CPU Cooler            │ PC Case & CPU         │ Height & Socket Bracket│
   │ Power Supply          │ System Hardware       │ Total Wattage Draw    │
   └───────────────────────┴───────────────────────┴───────────────────────┘
Hardware Compatibility Checklist
| Primary Component | Secondary Component | Compatibility Check Requirement |
| CPU | Motherboard | Socket type must match exactly (e.g., AMD AM5 to AM5 board). |
| Motherboard | PC Case | Case must support board size (e.g., ATX board in ATX case). |
| Motherboard | RAM | DDR generation must match board specification (DDR4 vs DDR5). |
| GPU | PC Case | Card length (mm) must not exceed maximum case GPU clearance. |
| CPU Cooler | PC Case | Tower height (mm) must not exceed case cooler height limit. |
| CPU Cooler | CPU | Mounting bracket must support the CPU socket architecture. |
| Power Supply | Full System | Total estimated wattage draw should not exceed 80% of PSU max output. |
(Tip: Free online tools such as PCPartPicker automatically check socket types, dimensional clearances, and estimated system power consumption.)
Tools You Need
Assembling a computer requires minimal specialized equipment:
-
Phillips #2 Screwdriver: A magnetic tip screwdriver is strongly recommended to prevent dropping small screws into tight case crevices.
-
Clean, Flat Workspace: A large wooden, laminate, or tile table offers a stable environment. Avoid assembling a PC on carpeted floors to eliminate the risk of electrostatic discharge (ESD).
-
Anti-Static Precautions: While modern components feature built-in static protection, periodically touch a grounded metal object (such as your plugged-in, powered-off PSU) to discharge static buildup from your body.
-
Velcro Ties / Cable Ties: Used to bundle wires together behind the motherboard tray.
-
USB Flash Drive (16 GB+): Required to download and create a bootable Windows installation drive from another computer.
-
Thermal Paste: Optional. Most modern air and liquid CPU coolers come with thermal paste pre-applied on the baseplate or include a small tube in the box.
Step-by-Step: How to Build Your Gaming PC
The physical assembly process is safest and easiest when divided into two main stages: Out-of-Case Prep (installing small components onto the motherboard outside the chassis) and In-Case Assembly (mounting the board, power supply, and expansion cards inside the case).
Step 1 — Prepare Your Workspace
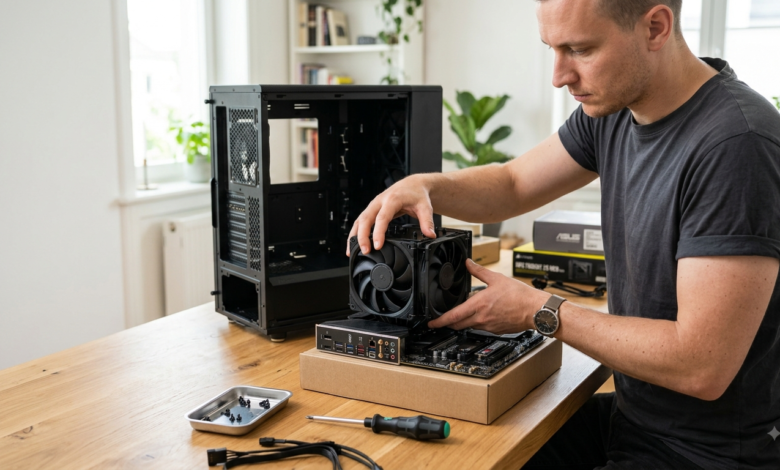
Clear your workspace, unbox your motherboard, and lay its cardboard box flat on your table. Use the top of the cardboard motherboard box as a non-conductive assembly station.
⚠️ Warning: Never place your motherboard on top of its grey anti-static shipping bag. The outer layer of anti-static bags contains conductive metallic material that can cause electrical shorts if powered during bench testing.
Step 2 — Prepare the Motherboard
Lay the motherboard flat on top of the cardboard box. Inspect the board to locate the CPU socket, RAM DIMM slots, M.2 SSD slots, and main power connectors.
Step 3 — Install the CPU
-
Unlatch the Socket: Locate the CPU socket lever. Push the metal retention lever down, unclip it to the side, and lift the arm fully upright. On Intel boards, the metal socket cover will swing open. On AMD AM5 boards, the arm lifts the retention frame.
-
Locate Alignment Marks: Locate the small golden triangle printed on one corner of your CPU PCB. Match it to the small triangle icon stamped into the corner of the motherboard socket.
       CPU Alignment Example:
       ┌────────────────────────┐
       │▲ [Gold Triangle]       │
       │                        │
       │    Intel / AMD CPU     │
       │                        │
       └────────────────────────┘
                 │ Align with
                 ▼
       ┌────────────────────────┐
       │▲ [Matching Notch/Icon] │
       │    Motherboard Socket  │
       └────────────────────────┘
-
Seat the Processor: Hold the CPU by its side edges. Gently lower it straight down into the socket. It should drop smoothly into place without requiring any pressure.
⚠️ Safety Warning: Do NOT force or press down on the CPU. If it does not seat flush, pick it up, double-check your triangle alignment marks, and try again. Forcing an unaligned CPU will bend delicate gold socket pins and permanently destroy the hardware.
-
Lock the Mechanism: Lower the metal retention frame back down. Push the metal lever down and swing it under its locking catch. The plastic protective socket cover will automatically pop off—save this cover inside your motherboard box for warranty returns.
Step 4 — Install RAM (Memory)
-
Identify the Correct Slots: Consult your motherboard manual to find the primary dual-channel RAM slots (typically slots A2 and B2—the 2nd and 4th slots counting away from the CPU).
-
Open the Latches: Push down the plastic retention clips at the top (and sometimes bottom) of the designated RAM slots.
-
Align the Notch: Look at the gold contact pins on the bottom of the RAM stick. Notice the off-center notch. Align the notch with the matching plastic divider inside the motherboard slot.
-
Apply Firm Pressure: Position the RAM stick vertically in the slot. Place both thumbs on opposite ends of the RAM module and press firmly straight down until you hear a distinct click, and the side clips snap closed automatically.
Step 5 — Install the M.2 NVMe SSD
-
Remove Heatsink (If Present): Un-screw the metal M.2 heatsink cover on your motherboard (usually located directly below the CPU socket) and lift it off.
-
Insert the Drive: Slide the gold contacts of the M.2 SSD into the M.2 slot at a 30-degree angle.
    M.2 Installation Angle:

            M.2 SSD
          ┌───────────┐
         ╱            │
        ╱ 30° Angle   │
       ▼              └─────────────
    ┌──────┐
    │ SLOT │ Motherboard PCB
    └──────┘────────────────────────
-
Secure the Drive: Push the elevated end of the drive flat against the standoff screw mount. Secure it using the tiny provided M.2 screw or by rotating the toolless plastic latch mechanism.
-
Reinstall Heatsink: Peel off the clear protective plastic film from the thermal pad located on the underside of the motherboard heatsink, then screw the heatsink back over the SSD.
Step 6 — Install the CPU Cooler
(Note: Air cooler mounting hardware varies slightly between brands. Always consult your cooler’s specific instruction manual.)
-
Install Mounting Brackets: Secure the specified backplate and standoff screws around your CPU socket according to your cooler manual.
-
Thermal Paste Application: If your CPU cooler does not have grey thermal paste pre-applied to its copper base, apply a small pea-sized dot of thermal paste directly to the center of the CPU’s metal heat spreader.
       Thermal Paste Pattern:
       ┌────────────────────────┐
       │                        │
       │        ●  [Pea-Sized]  │
       │                        │
       └────────────────────────┘
-
Mount the Heatsink: Remove any clear protective plastic film covering the bottom copper plate of the CPU cooler. Lower the heatsink onto the CPU standoff screws.
-
Tighten Screws: Tighten the mounting screws in an alternating X-pattern (top-left, bottom-right, top-right, bottom-left) using a few turns each time to spread pressure evenly across the CPU surface.
-
Connect Power: Plug the cooler’s fan cable into the motherboard header labeled
CPU_FAN.
Step 7 — Install the Motherboard in the Case
-
Check Standoffs: Inspect the interior of your PC case to ensure brass standoffs (small hexagonal spacer pegs) are pre-installed in positions that match your motherboard’s mounting holes.
-
I/O Shield: If your motherboard has a separate loose metal I/O shield (rather than a pre-attached rear cover), snap it into the rectangular rear opening of the case from the inside out.
-
Lower the Motherboard: Carefully tilt the motherboard into the case, guiding its rear output ports into the openings of the rear I/O panel. Align the board’s screw holes over the brass case standoffs.
-
Fasten Screws: Secure the motherboard using the provided motherboard chassis screws. Tighten until snug; do not overtighten to avoid damaging the circuit board.
Step 8 — Install the Power Supply (PSU)
-
Orient the Fan: Place the power supply into the bottom PSU bay at the rear of the case. Position the PSU’s large intake fan facing downward toward the ventilated bottom mesh filter of the case.
-
Secure the Unit: Fasten the PSU to the back panel of the case using four coarse-thread PSU screws.
-
Route Main Cables:
-
24-pin ATX Power: Route the thick main power cable through the nearest cable grommet and plug it into the long 24-pin header on the right edge of the motherboard.
-
8-pin EPS (CPU Power): Route the CPU power cable behind the back tray and plug it into the 8-pin connector located at the top-left corner of the motherboard.
-
Step 9 — Install the Graphics Card (GPU)
-
Identify the PCIe Slot: Locate the top PCIe x16 slot on your motherboard (the slot closest to the CPU, which provides full bandwidth).
-
Remove Case Expansion Covers: Unscrew and remove the corresponding metal expansion slot covers from the back panel of the PC case.
-
Open Retention Latch: Push down the plastic latch located at the far right end of the motherboard’s PCIe slot.
-
Seat the GPU: Hold the graphics card level, align its gold connector over the PCIe slot, and press straight down firmly until the plastic slot latch snaps closed with an audible click.
    GPU Installation:

            Graphics Card
        ┌───────────────────┐
        │                   │
        └───────┐   ┌───────┘
                │   │
                ▼   ▼
        ┌───────────────────┐ ─── [Latch snaps shut]
        │    PCIe Slot      │ █
        └───────────────────┘
-
Secure to Case: Fasten the GPU’s metal retention bracket to the rear case expansion slot using thumbscrews.
-
Connect PCIe Power: Plug the required PCIe power cables from your PSU (or the dedicated 12V-2×6 cable) firmly into the side of the graphics card. Ensure the connector latches make full contact without gaps.
Step 10 — Connect Front-Panel and Case Cables
Connect the small chassis wires to their designated headers along the bottom and side edges of the motherboard:
-
Front Panel IO (
JFP1): Connect the small system wires for the Power Button (POWER SW), Reset Button (RESET SW), and Power Light LEDs (POWER LED). Refer to the small wiring diagram printed in your motherboard manual for exact pin polarities (+ and -).
   Typical Front Panel Pin Diagram (JFP1 Header):

   [ Pwr LED + ] [ Pwr LED - ] [ Power SW ] [ Power SW ]  <-- Top Row
   [ HDD LED + ] [ HDD LED - ] [ Reset SW ] [ Reset SW ]  <-- Bottom Row
-
USB 3.0 / Type-C: Plug the wide front-panel USB header cables into their corresponding motherboard slots.
-
HD Audio (
JAUD1): Plug the front panel headphone/microphone cable into the bottom-left audio header. -
Case Fans: Connect remaining intake and exhaust fan wires into motherboard headers labeled
SYS_FANorCHA_FAN.
Step 11 — Cable Management
Clear, tidy cable routing improves internal case airflow and creates a clean aesthetic:
-
Pull excess slack from power cables into the void next to the power supply or behind the motherboard back tray.
-
Group main cable channels together using Velcro straps or zip ties.
-
Ensure no loose fan wires trail near the spinning blades of the CPU cooler or graphics card.
What to Do When You Turn Your New PC On
With assembly complete, it is time for your initial boot sequence, commonly called the POST (Power-On Self Test).
Initial Setup Steps
-
Connect your display cable (HDMI or DisplayPort) directly into the graphics card output ports, not into the ports higher up on the motherboard I/O panel.
       Correct Display Output Connection:
       ┌────────────────────────┐
       │ Motherboard I/O Panel  │
       │  [ USB ]  [ Audio ]    │
       │  [ DO NOT PLUG HERE ]  │ ❌
       ├────────────────────────┤
       │ Expansion Slots        │
       │ ┌────────────────────┐ │
       │ │ Graphics Card (GPU)│ │
       │ │ [PLUG MONITOR HERE]│ │ ◄─── YES! ✔️
       │ └────────────────────┘ │
       └────────────────────────┘
-
Plug in your keyboard, mouse, and power cord.
-
Flip the switch on the back of the power supply from O (Off) to I (On).
-
Press the case power button.
Understanding the First Boot
Modern computer platforms perform memory training during their first power-on cycle. The screen may remain black for up to 60–90 seconds while the motherboard tests system memory settings. Do not power off the system during this initial cycle.
Once memory training completes, the system fans will settle, the screen will light up, and the display will present the motherboard splash screen prompting you to enter System Setup.
BIOS/UEFI Setup
Press the Delete or F2 key repeatedly during startup to enter the BIOS/UEFI management menu.
                  Basic BIOS Checklist
  ┌──────────────────────────────────────────────────┐
  │  1. Check System Info (CPU Name & Temp ~30-40°C) │
  │  2. Confirm Detected RAM Capacity (e.g. 32 GB)    │
  │  3. Enable Memory Profile (XMP / EXPO / DOCP)     │
  │  4. Verify Primary NVMe SSD Storage Detected     │
  │  5. Set USB Installer Drive as First Boot Device │
  └──────────────────────────────────────────────────┘
-
Verify Hardware Detection: Confirm that the main BIOS screen correctly displays your CPU model, installed RAM capacity (e.g., 32,768 MB), and connected SSD storage drives.
-
Check CPU Temperatures: Verify that CPU idle temperatures remain stable between 30°C and 45°C. If the CPU temperature climbs rapidly toward 90°C while idle in the BIOS, immediately power down—your cooler is not mounted properly or thermal paste contact is missing.
-
Enable Memory Profile: By default, high-speed RAM runs at baseline speeds. Enable XMP (Intel) or EXPO (AMD) in the BIOS settings to allow your RAM to operate at its advertised speed and timings.
-
Save and Exit: Press F10 to save your BIOS settings and exit.
How to Install Windows and Drivers
1. Install Operating System
-
On a secondary working computer, download the official Windows Media Creation Tool from Microsoft’s website. Insert a clean 16 GB+ USB flash drive and follow the prompts to build a bootable installation drive.
-
Insert the bootable USB drive into a rear USB port on your new gaming PC and power it on.
-
The system will auto-boot from the USB drive into the Windows Setup wizard. Select your language preferences and click Install Now.
-
When prompted to select an installation location, choose the Unallocated Space on your main M.2 NVMe SSD drive and click Next. Windows will handle partitioning and file expansion automatically.
2. Configure System Drivers
Once Windows boots to the desktop, you must install device drivers to unlock full hardware performance:
-
Run Windows Update: Go to Settings > Windows Update and download all critical operational updates.
-
Install Motherboard Chipset Drivers: Visit your motherboard manufacturer’s support webpage (e.g., ASUS, MSI, Gigabyte, ASRock) to download and install official chipset drivers, audio drivers, and LAN/Wi-Fi drivers.
-
Install GPU Drivers: Visit NVIDIA, AMD, or Intel’s official website to download the latest display drivers for your graphics card. This step is necessary to enable full resolution display modes, high refresh rate support, and optimal gaming performance.
How to Test Your New Gaming PC
Before launching demanding games, run basic monitoring checks to verify overall system stability and cooling efficiency.
-
Install Hardware Diagnostics: Download free diagnostic utilities such as HWiNFO64 or Core Temp to monitor real-time temperatures, hardware clock speeds, and voltages.
-
Check Monitor Refresh Rate: Right-click your desktop, select Display Settings > Advanced Display, and adjust your refresh rate from default 60 Hz to your monitor’s maximum rated capability (e.g., 144 Hz, 240 Hz).
-
Run a Test Game: Launch a graphically demanding game for 20–30 minutes. Monitor thermal performance:
-
CPU Gaming Temperatures: Normal working range is 60°C to 80°C.
-
GPU Gaming Temperatures: Normal working range is 65°C to 83°C.
-
Common Beginner Problems and Fixes
If your new system experiences issues during its first boot, run through these standard troubleshooting checks:
1. System Shows No Signs of Power (No Fans, No Lights)
-
Check the PSU Switch: Confirm the toggle switch on the back of the power supply is set to I (On).
-
Verify Outlet Power: Ensure the wall power cord is pushed fully into the PSU socket.
-
Front Panel Pin Alignment: Re-verify that the small two-pin
POWER SWconnector from your case is attached to the correct pins on the motherboardJFP1header.
2. PC Turns On, Fans Spin, But No Display Signal
-
Check Display Cable Output: Confirm your monitor cable is plugged into the discrete graphics card rather than the motherboard video ports.
-
Reseat the RAM: Turn off the power supply, remove both RAM sticks, re-insert them into the primary slots, and press until both ends click firmly closed.
-
Reseat GPU Power Cables: Ensure the 8-pin or 12V-2×6 power connections going into your graphics card are fully snapped flush with no gap.
-
Check Diagnostic LEDs: Modern motherboards include small diagnostic lights labeled
CPU,DRAM,VGA, andBOOT. A light that stays illuminated pinpoints the exact component failing initialization.
3. Storage Drive Missing in Windows
-
Format New Storage: Right-click the Windows Start button, select Disk Management, locate your unallocated SSD drive, right-click its volume bar, and select New Simple Volume to assign it a drive letter (e.g.,
D:drive).
Common PC Building Mistakes
Avoid these frequent mistakes made by first-time builders:
                  TOP 5 MISTAKES TO AVOID
  ┌────────────────────────────────────────────────────────┐
  │ ❌ Plugs monitor into motherboard instead of GPU       │
  │ ❌ Forgets to remove protective plastic from cooler    │
  │ ❌ Installs RAM in adjacent slots (Single-Channel)     │
  │ ❌ Forgets motherboard standoffs inside the case      │
  │ ❌ Leaves power supply switch set to "O" (Off)         │
  └────────────────────────────────────────────────────────┘
-
Leaving Protective Plastic on the CPU Cooler Base: Many coolers include a clear plastic film over the copper contact pad. If not peeled off, the plastic will melt onto your CPU and cause severe overheating.
-
Plugging the Monitor into the Motherboard: Connecting display cables into the motherboard uses slow integrated graphics instead of your dedicated graphics card.
-
Installing RAM in Adjacent Slots: Installing RAM sticks side-by-side in slots 1 and 2 forces memory to run in single-channel mode. Always use alternating slots (1 and 3, or 2 and 4) for dual-channel bandwidth.
-
Forgetting CPU Power Cables: Beginners often plug in the large 24-pin motherboard cable but forget the dedicated 8-pin EPS CPU power cable near the top corner of the board.
-
Overtightening Screws: Screwing components in with excessive force can strip screw threads or crack printed circuit boards. Tighten hardware until snug, then stop.
Gaming PC Budget Planning
Allocating your budget properly ensures you spend money where it impacts performance most—avoiding scenarios where an expensive CPU is bottlenecked by a weak graphics card.
       Recommended Budget Breakdown:

       [ GPU ] ────────► 40% - 45% of total budget
       [ CPU ] ────────► 15% - 20% of total budget
       [ Motherboard ] ─► 10% - 12% of total budget
       [ RAM & SSD ] ──► 12% - 15% of total budget
       [ PSU & Case ] ──► 10% - 12% of total budget
Ideal Budget Allocation Ratio
-
Graphics Card (GPU): ~40% – 45% of total system budget.
-
Processor (CPU): ~15% – 20% of total system budget.
-
Motherboard: ~10% – 12% of total system budget.
-
RAM & SSD Storage: ~12% – 15% of total system budget.
-
Power Supply & Case: ~10% – 12% of total system budget.
(Note: Market pricing varies across regions. Always allocate the largest portion of a pure gaming budget toward the graphics card.)
Frequently Asked Questions (FAQ)
Is building a gaming PC difficult for beginners?
No. While it requires patience and careful reading, assembling a PC is a straightforward process. Modern components are designed with distinct physical keys and standardized latches, making it virtually impossible to plug cables into the wrong slots without using excessive, unnatural force.
What parts do I need to build a gaming PC?
A complete setup requires eight main core hardware components: a CPU, CPU cooler, motherboard, RAM, storage drive (M.2 NVMe SSD), graphics card (GPU), power supply (PSU), and a PC case.
How long does it take to build a gaming PC for the first time?
For a first-time builder reading manuals carefully, assembly typically takes 2 to 4 hours. Preparing your workspace and installing software will take another 1 to 2 hours.
What should I install first when building a PC?
It is always best to install the CPU, M.2 SSD, RAM, and CPU cooler mounting brackets onto the motherboard outside the case before mounting the board inside the chassis.
Why does my new PC turn on but show no display?
This is usually caused by plugging the display cable into the motherboard’s video port instead of the graphics card, unseated RAM modules, or incomplete PCIe power cable connections on the GPU.
Can I build a gaming PC without experience?
Yes. Millions of people build their own custom computers every year with zero technical backgrounds by following structured step-by-step assembly guides and video tutorials.
Conclusion
Building your own custom desktop is one of the most rewarding experiences in modern technology. Beyond saving money compared to pre-built systems, taking control of your hardware gives you a deep understanding of how your PC works, making future hardware upgrades simple and stress-free.
By taking your time, keeping your workspace organized, and following each step carefully, you can assemble a clean, reliable, and high-performance gaming PC built to your exact preferences. Once your operating system and drivers are configured, sit back, launch your favorite games, and enjoy the performance of a custom machine you built with your own hands.